Gypsum Plaster LED Aluminum Profile

Plan a clean line of light before the plasterboard is finished. Unionopto’s Gypsum Plaster LED Aluminum Profile range brings together double-wing channels, single-wing edge profiles, vertical-wing sections and angled or curved-face designs for architectural LED strip lighting.

Compare the section and fixing arrangement first. The right choice depends on the board construction, finished opening, LED strip and diffuser. A similar-looking cover does not make two profiles interchangeable.

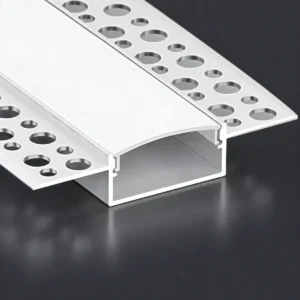
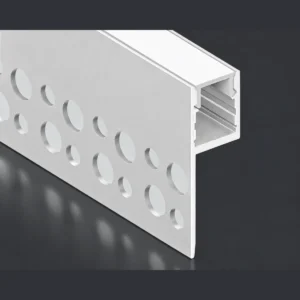
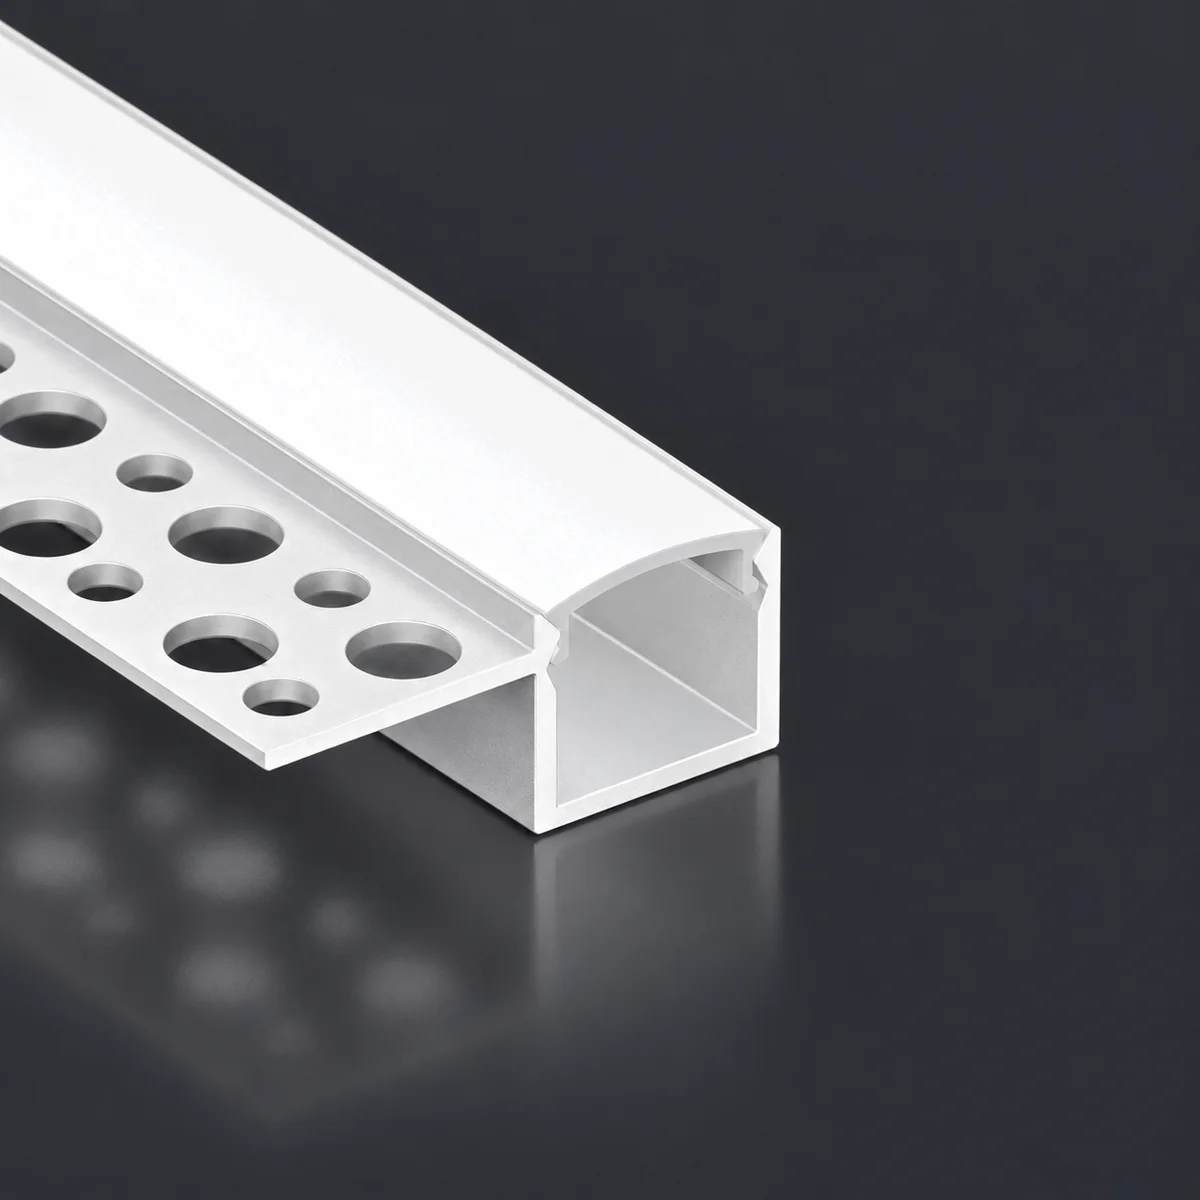
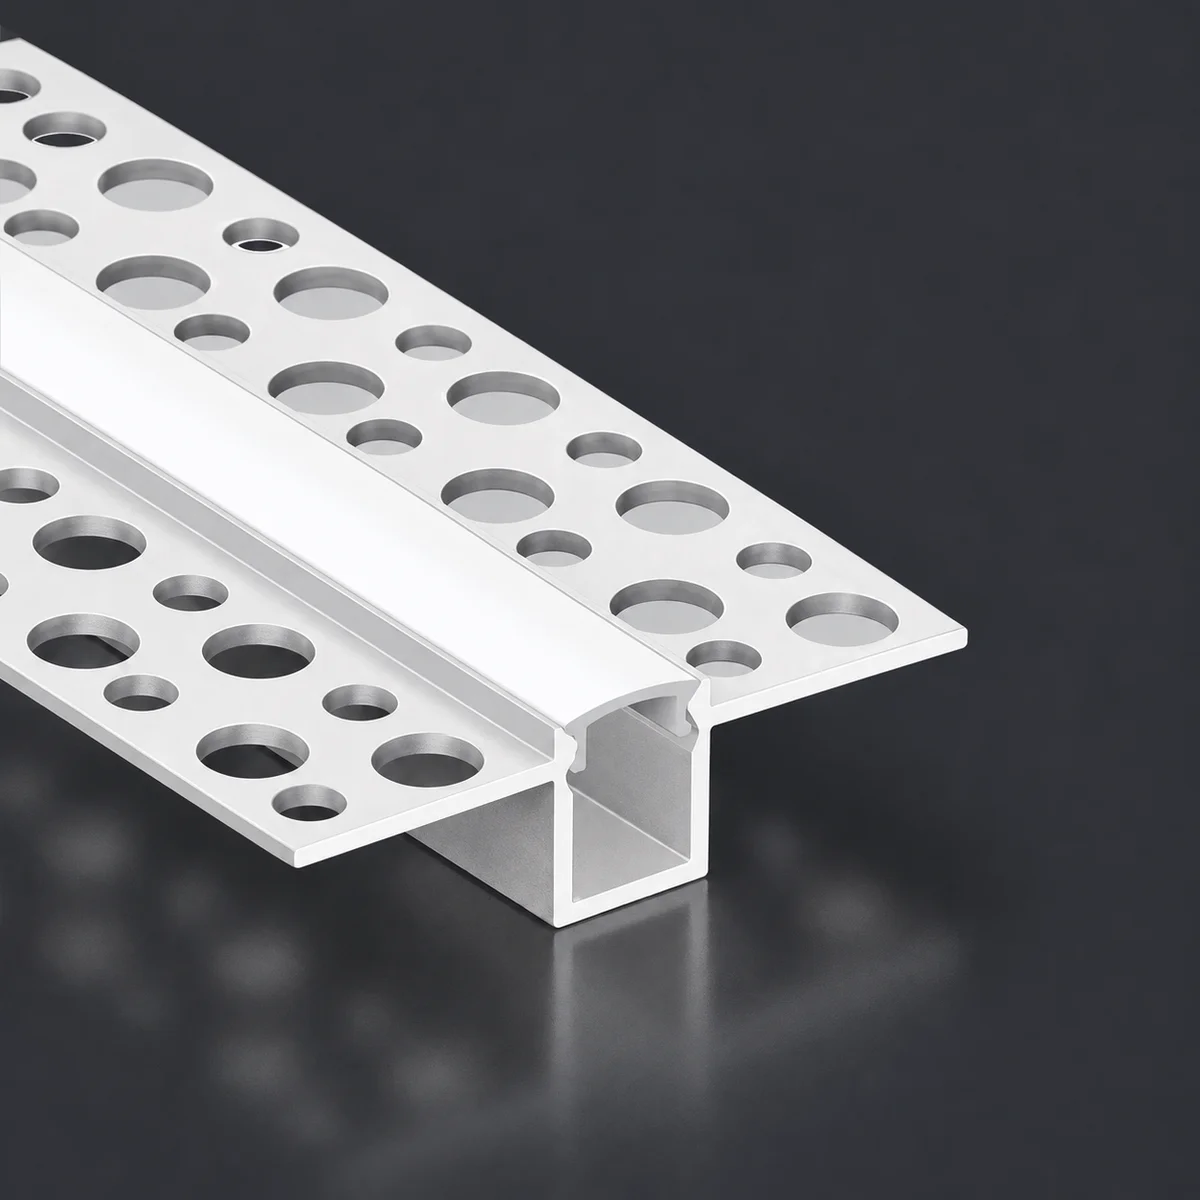
LSH-1013DU double-wing plaster-in LED aluminum channel with perforated fixing flange

What is a plaster-in LED profile?

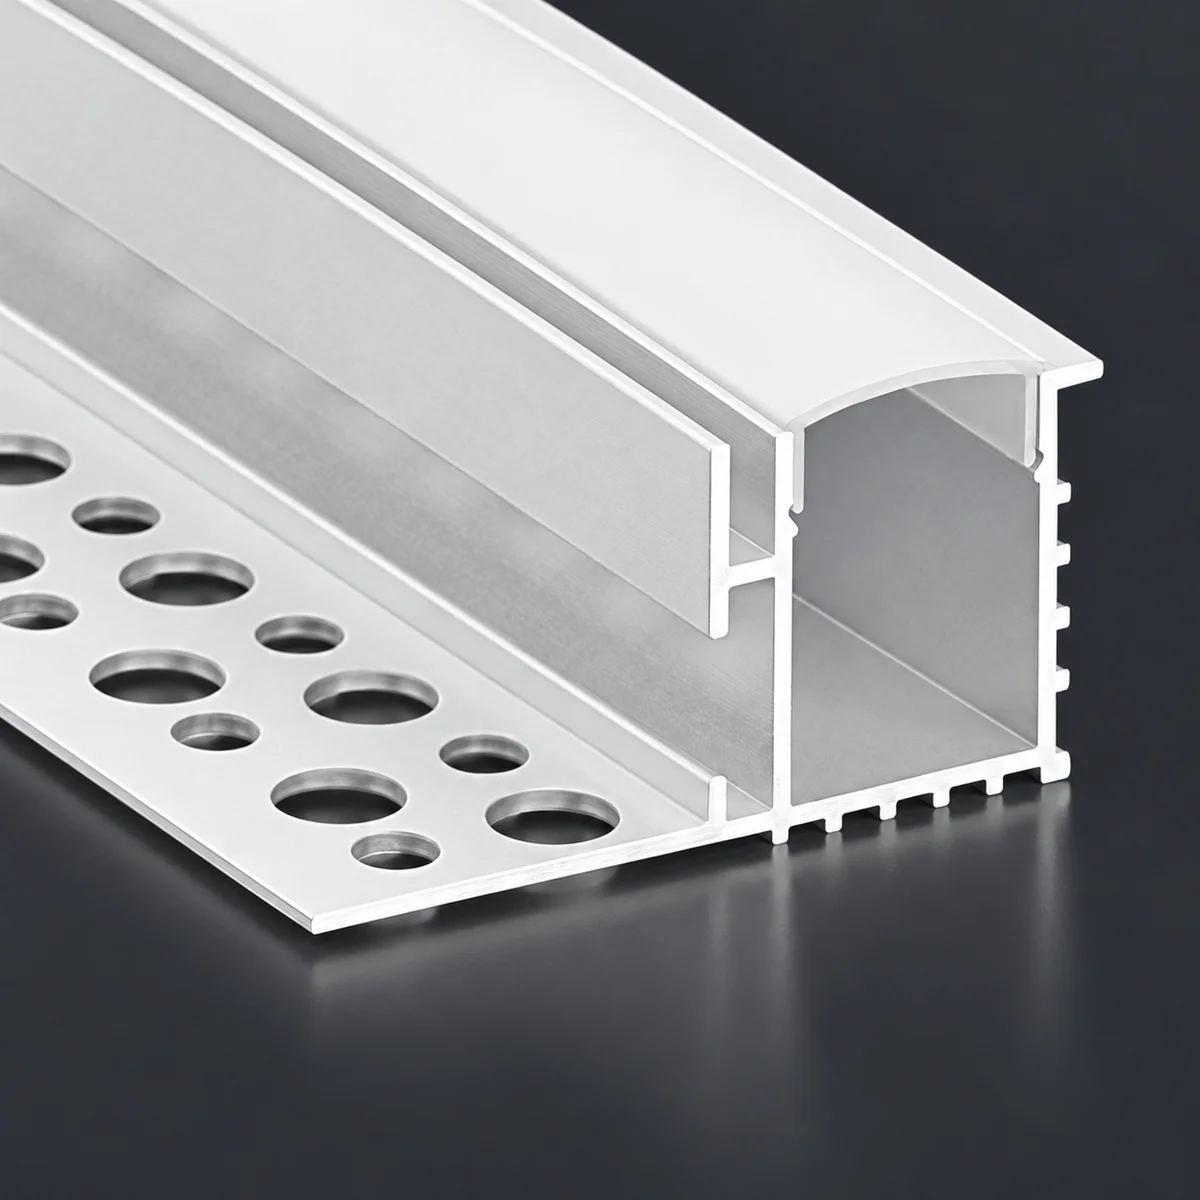
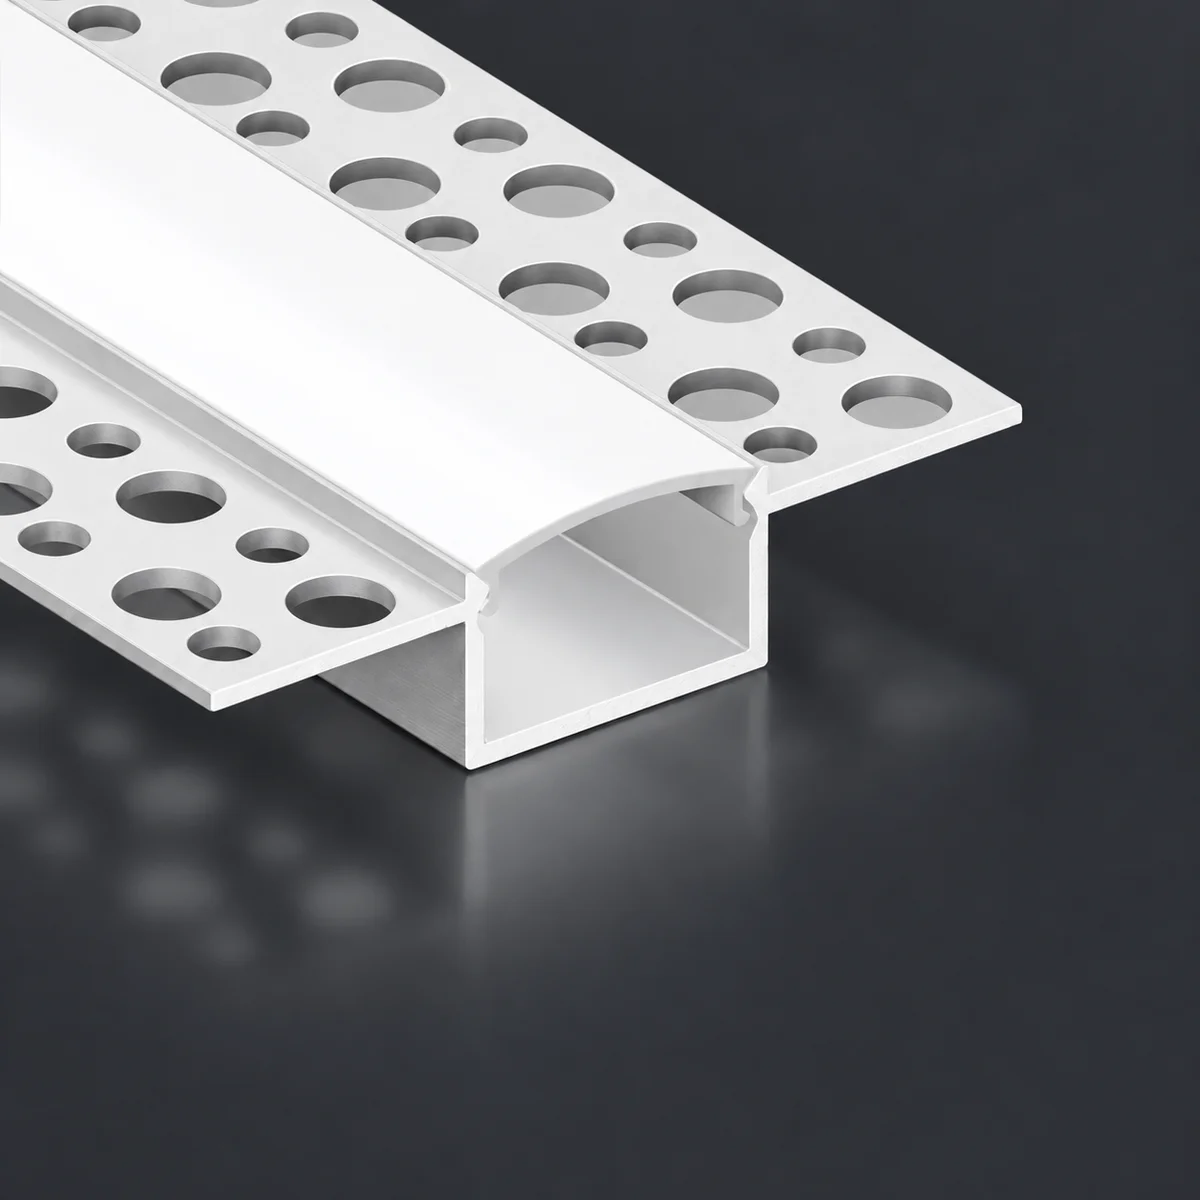
A plaster-in LED profile is an aluminum channel designed to integrate into a plasterboard or gypsum-board detail. Its fixing wings are covered as part of the finishing process, leaving the intended light opening visible. You may also see the terms plasterboard LED profile, drywall LED channel, mud-in channel and trimless LED profile.

The profile houses a compatible LED strip and cover. It is one component of the lighting system. The strip, power supply, wiring, thermal performance and installation detail still need to be specified. For a neat result, coordinate the section with the ceiling or wall design before construction closes.

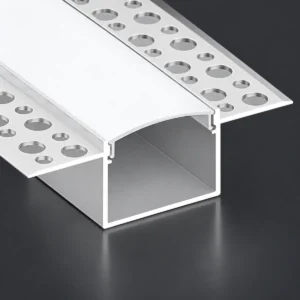
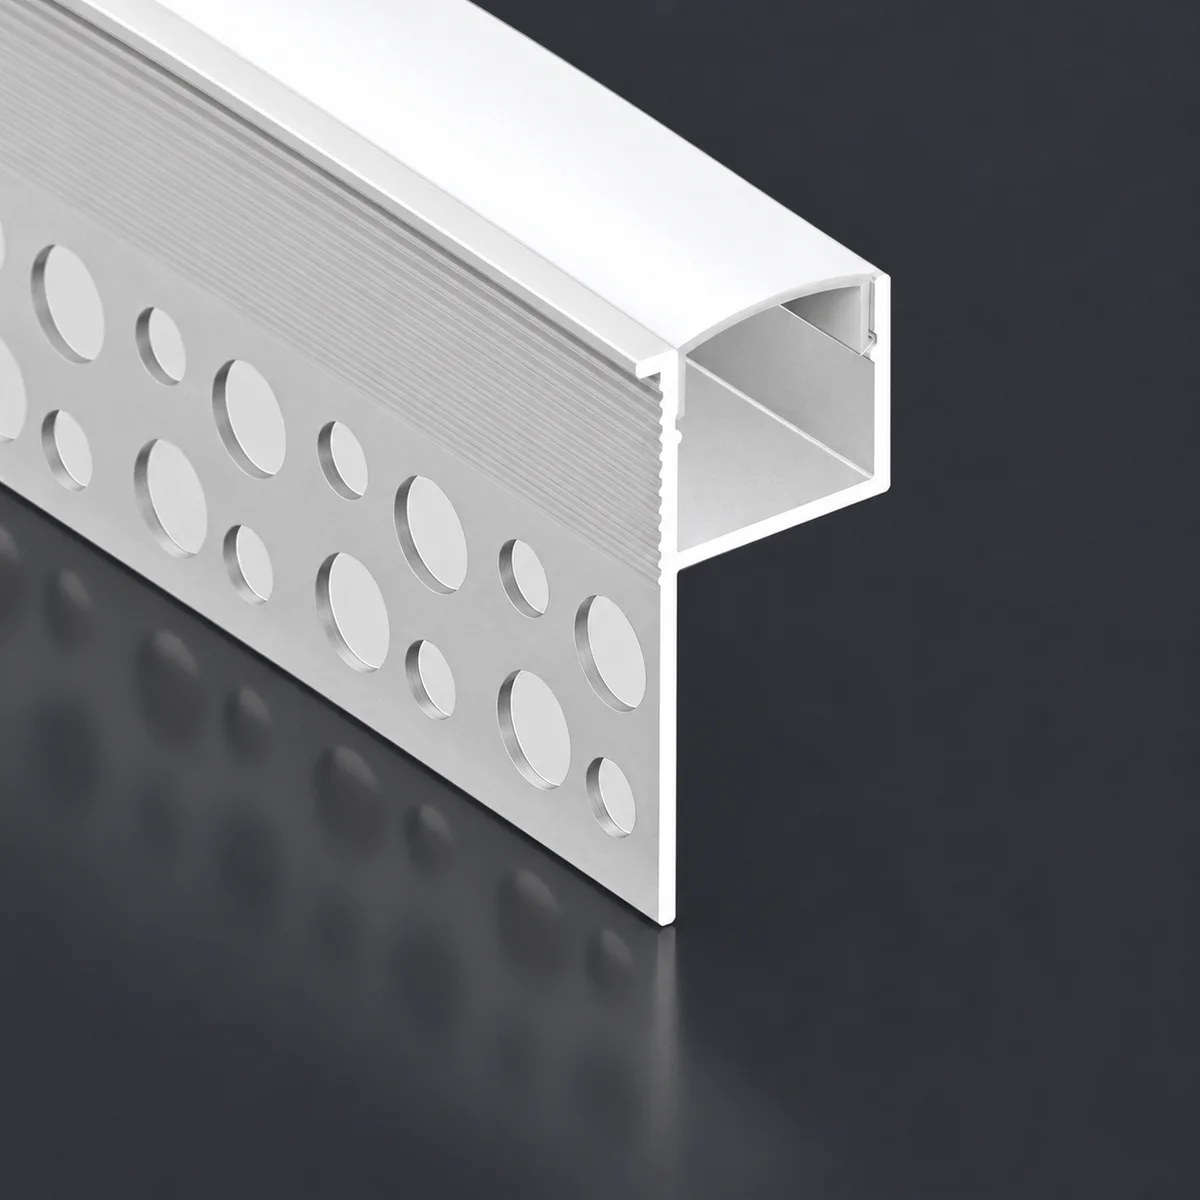
LSH-2013DU double-wing plaster-in LED aluminum channel with perforated fixing flange

Choose the fixing geometry first

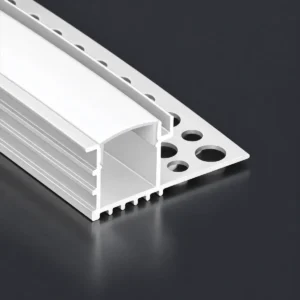
Start with the board edge, rather than the desired light-line width alone. Double-wing sections suit details with room to fix and finish on both sides. Single-wing profiles are candidates for one-sided terminations. Vertical-wing sections need a coordinated board-edge or reveal detail. Angled and curved-face profiles change the visible surface or light direction and should be assessed in a mock-up.

The catalog includes upper-level and lower-level flange arrangements. We use DU, DD, SU and SD only as item identifiers; the section drawing must establish the final installation orientation. Send a sketch showing the board thickness, supporting frame, visible opening and cable route.

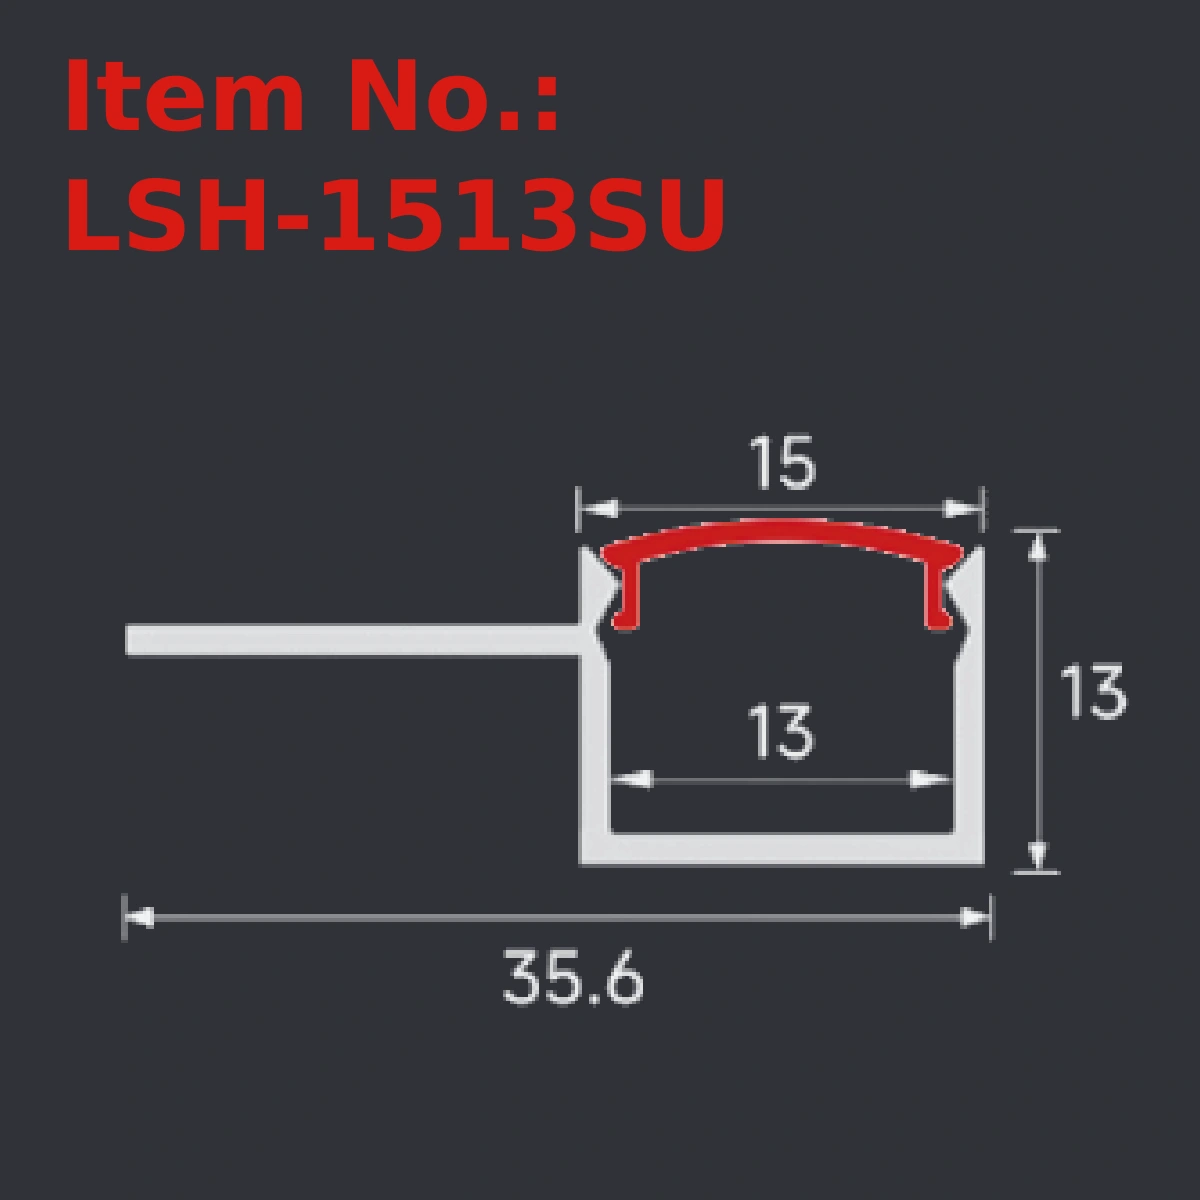
LSH-1513SU plaster-in LED profile section drawing with catalog dimension labels

Compare face width, channel depth and strip clearance

For restrained accent lines, begin with the narrow sections carrying 10, 12, 15 or 20 mm face labels. For broader visible bands, compare the 30, 40 and 50 mm families. These are catalog labels; they do not all represent the same installation dimension.

Many double-wing designs have a 13 mm overall height. The wider range also includes 20 mm-high options. More depth can change the mixing distance, but it does not guarantee uniform output. Test the selected LED density and diffuser. Internal span, strip PCB width, solder pads and connector width must be checked separately.

Do not order a strip whose width exactly equals a catalog internal span without checking tolerances and assembly clearance. Do not use the total flange width as the ceiling cutout. Confirm the approved drawing for every item in the order.

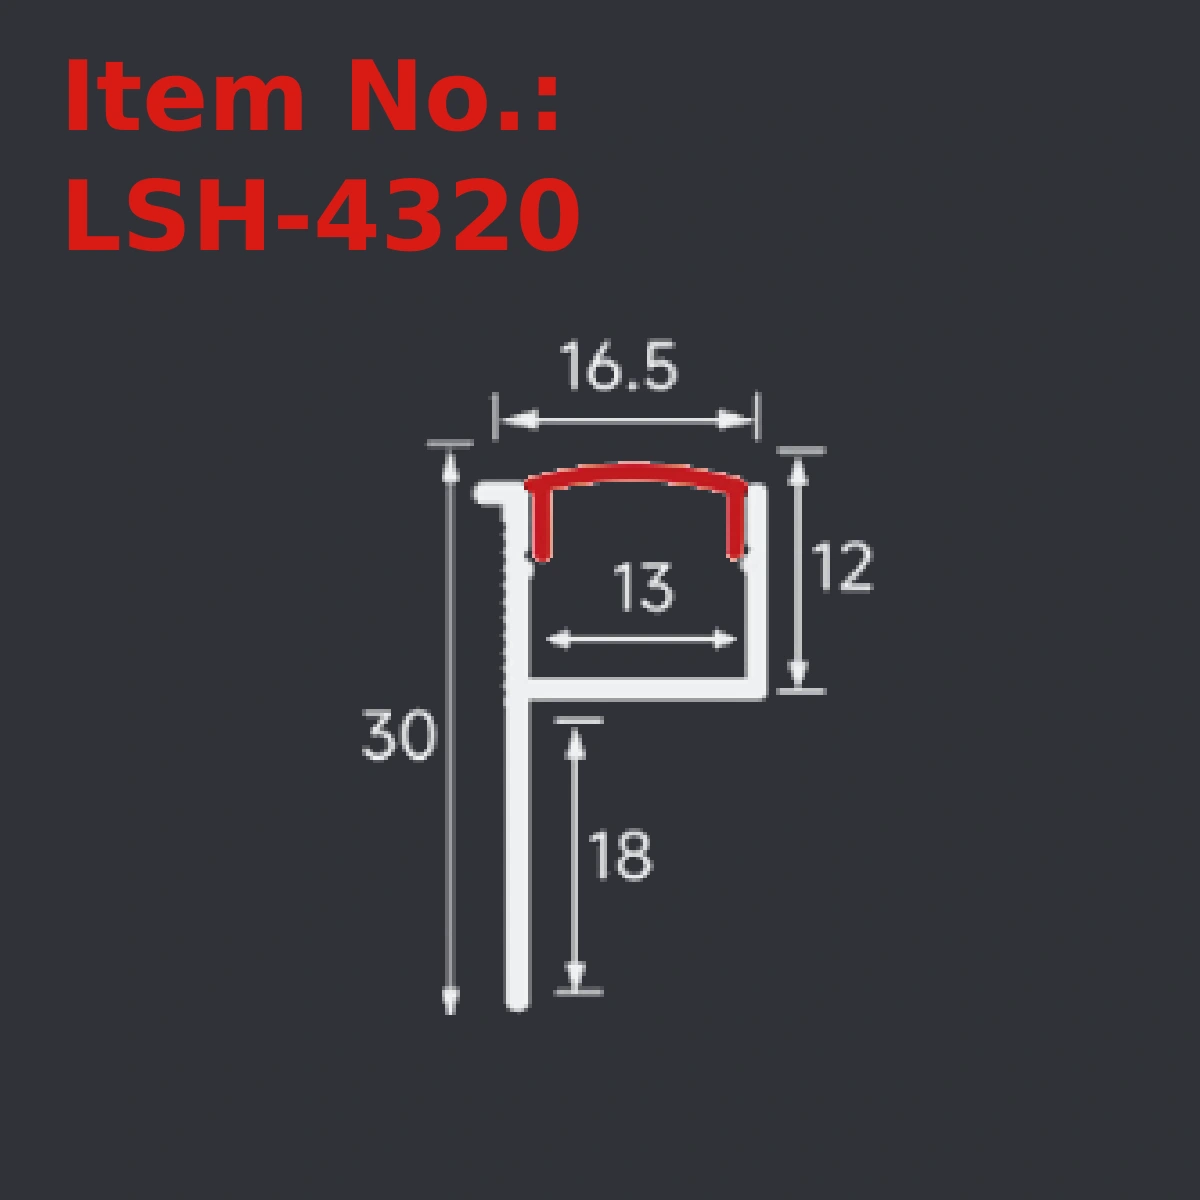
LSH-4320 plaster-in LED profile section drawing with catalog dimension labels

Selection shortlist for common project needs

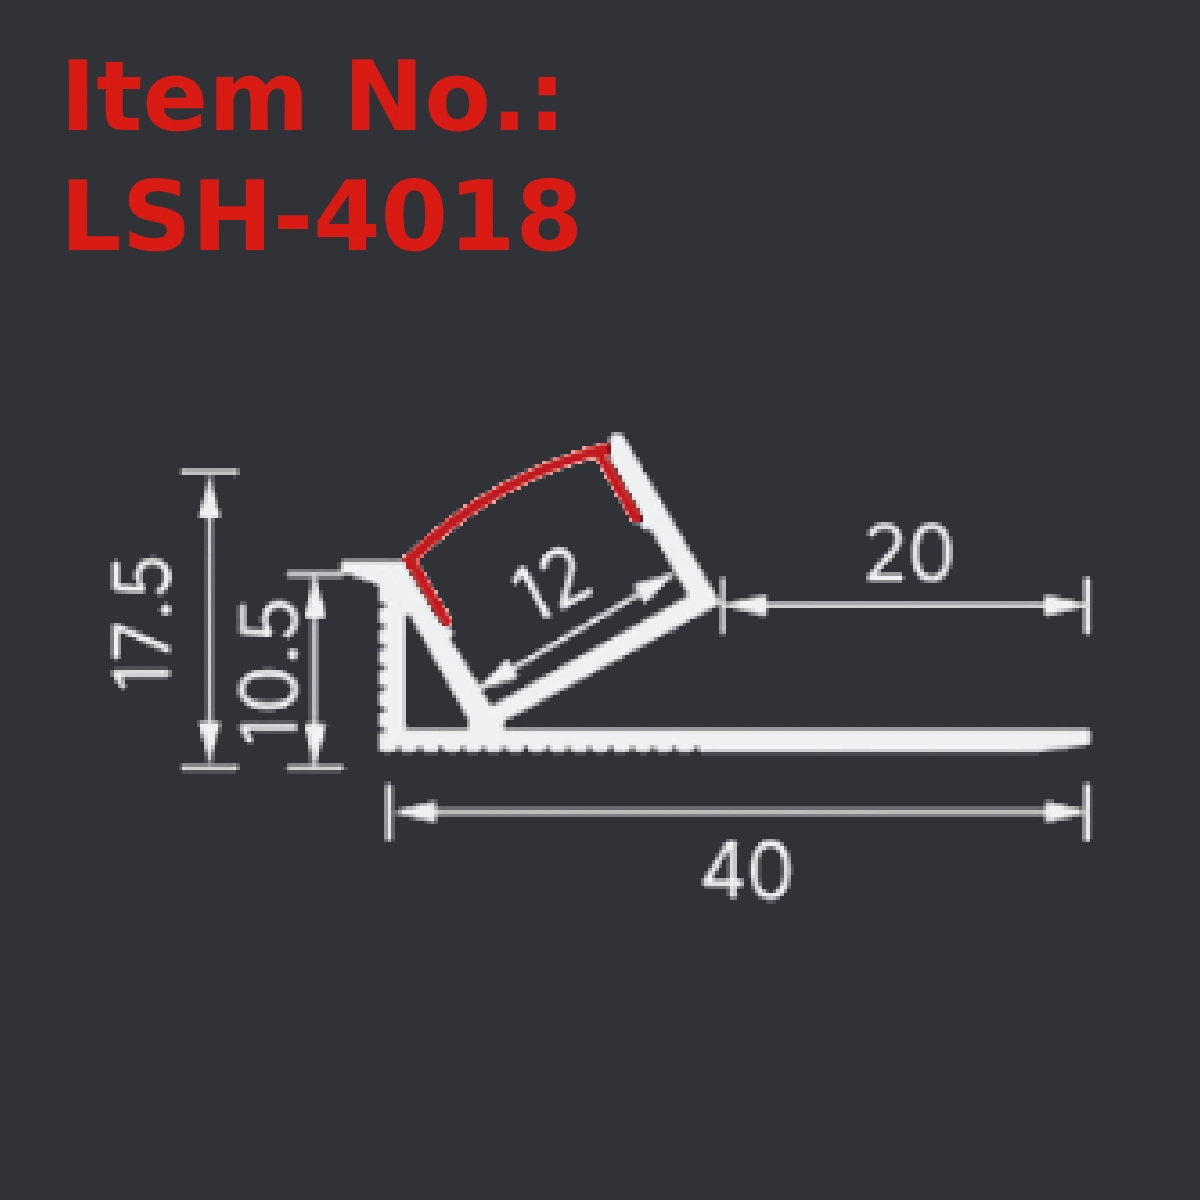
Narrow ceiling accent: compare LSH-1013DU, LSH-1313DU and LSH-1513DU. Review the lower-flange DD alternatives where the board detail requires a different fixing level. Broader straight light line: compare the LSH-3013, LSH-4013 and LSH-5013 families, then check the 3020, 4020 or 5020 versions where the design allows a deeper body. One-sided plasterboard edge: compare LSH-1513SU/SD, LSH-2013SU/SD, LSH-704 and LSH-2418. Their wing and body details differ, so use a drawing-led comparison. Directional or shaped detail: review LSH-4018, LSH-3520 and LSH-601C with a site mock-up. For a vertical board-edge fixing arrangement, review LSH-703 and LSH-4320 from catalog 1. This shortlist follows visible geometry. It is not a sales ranking.
LSH-4018 plaster-in LED profile section drawing with catalog dimension labels

Explore the profile range

Compare each product photograph with its section drawing. The table below records the catalog readings for all 31 selected catalog profiles. Dimensions and final item numbers must be approved before manufacture. Open a product for its selection notes, application ideas and quotation checklist.

Item No.TypeOverall W × H, mmFace label, mm
LSH-1013DUDouble-wing plaster-in45 × 1310
LSH-1313DUDouble-wing plaster-in47 × 1312
LSH-1513DUDouble-wing plaster-in51 × 1315
LSH-2013DUDouble-wing plaster-in55 × 1320
LSH-1013DDDouble-wing plaster-in46 × 1310
LSH-1313DDDouble-wing plaster-in48 × 1312
LSH-1513DDDouble-wing plaster-in51 × 1315
LSH-2013DDDouble-wing plaster-in55 × 1320
LSH-1513SUSingle-wing plaster-in35.6 × 1315
LSH-2013SUSingle-wing plaster-in38 × 1320
LSH-1513SDSingle-wing plaster-in35.6 × 1315
LSH-2013SDSingle-wing plaster-in38 × 1320
LSH-704Single-wing plaster-in38.5 × 1420
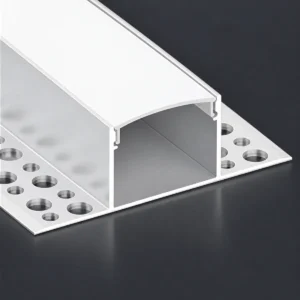
LSH-4320Vertical-wing plaster-inTO CONFIRM × 3016.5
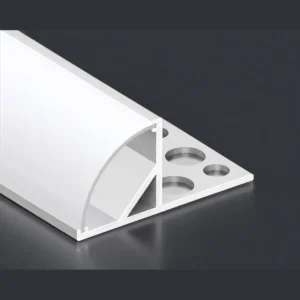
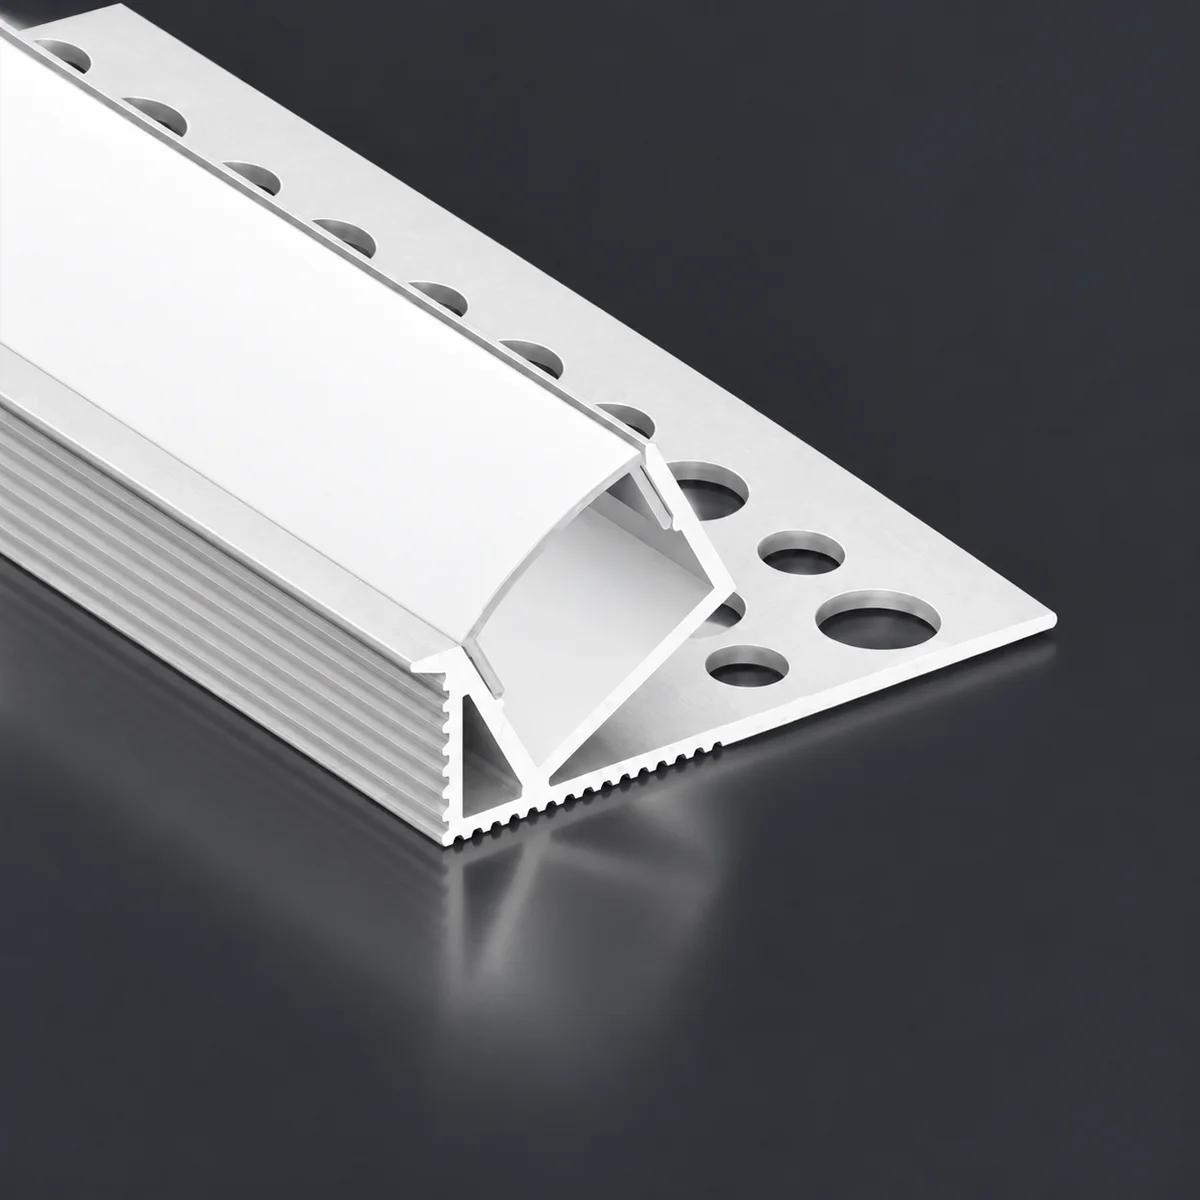
LSH-4018Angled plaster-in40 × 17.512
LSH-3520Angled plaster-inTO CONFIRM × 35.620.2
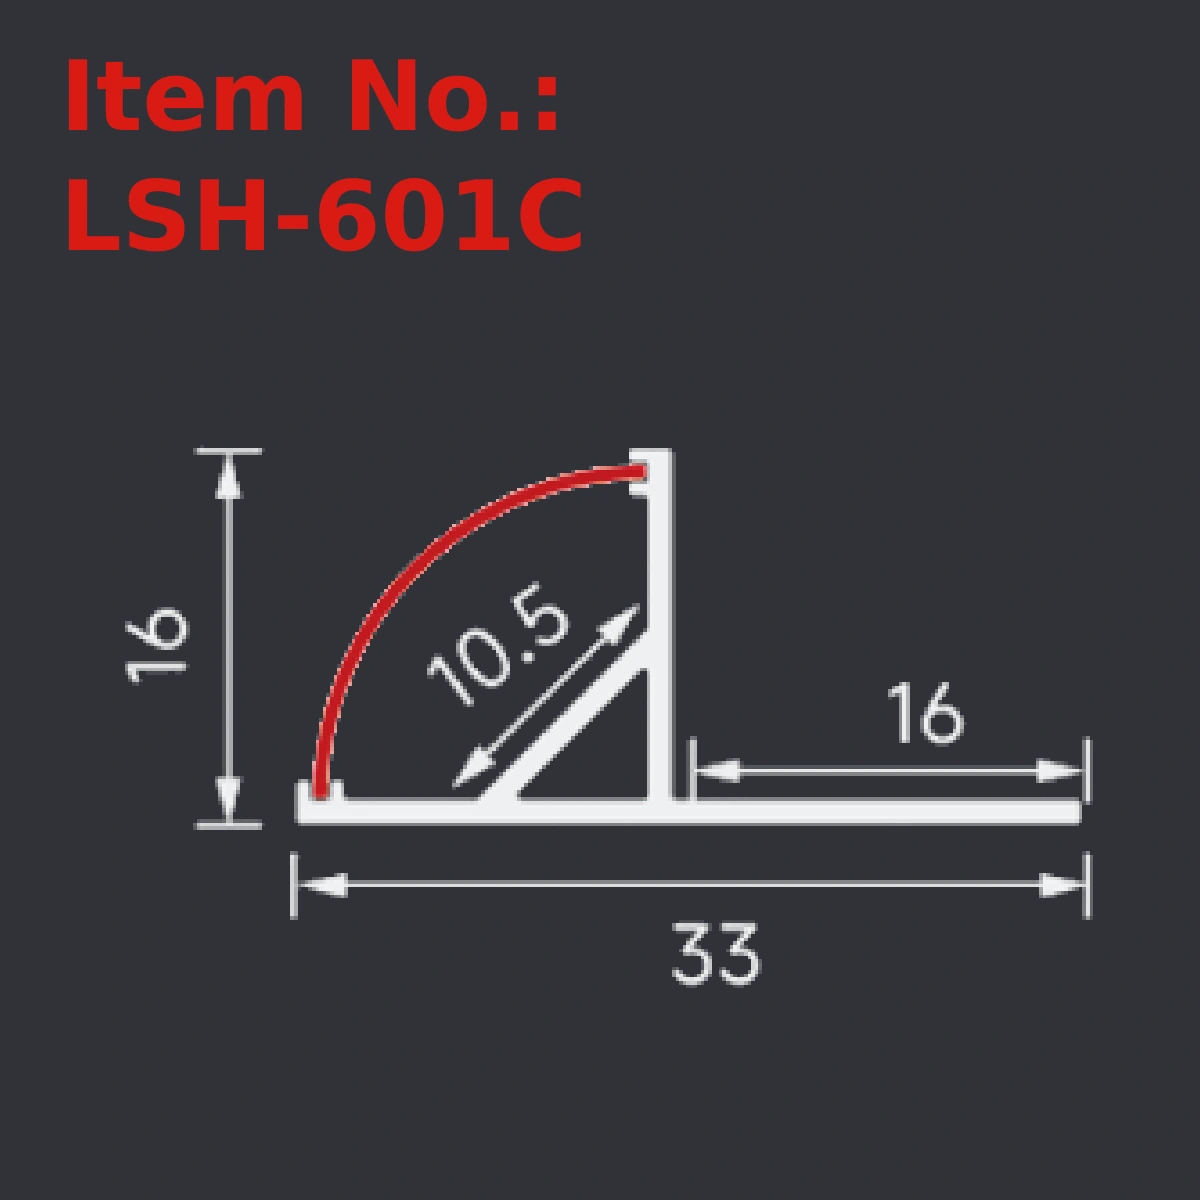
LSH-601CCurved-face plaster-in33 × 16TO CONFIRM
LSH-703Vertical-wing plaster-inTO CONFIRM × 3312
LSH-2418Single-wing plaster-in40 × 18.6TO CONFIRM
LSH-3013DUDouble-wing plaster-in70 × 1330
LSH-3013DDDouble-wing plaster-in70 × 1330
LSH-3020DDDouble-wing plaster-in70 × 2030
LSH-3020DUDouble-wing plaster-in70 × 2030
LSH-4013DUDouble-wing plaster-in80 × 1340
LSH-4013DDDouble-wing plaster-in80 × 1340
LSH-4020DUDouble-wing plaster-in80 × 2040
LSH-4020DDDouble-wing plaster-in80 × 2040
LSH-5013DDDouble-wing plaster-in90 × 1350
LSH-5013DUDouble-wing plaster-in90 × 1350
LSH-5020DUDouble-wing plaster-in90 × 2050
LSH-5020DDDouble-wing plaster-in90 × 2050

Project pitfalls to resolve before plastering

Wrong recess: establish the body width, wing width and board position on the approved detail. A wide flange can hide the fixing zone without defining the correct cutout.

Cracking at the edge: coordinate rigid fixing, the board joint and the specified reinforcement and finishing system. Do not assume perforations alone prevent every crack.

Blocked diffuser seat: protect the channel during plastering and painting. Check that compound cannot enter the cover engagement area.

Visible LED points: test the actual strip, cover and viewing distance. A white cover or a larger model number does not guarantee a continuous light line.

No maintenance access: plan cover removal, cable entry, driver access and end treatment before closing the ceiling. Confirm how a damaged strip will be replaced.

Unverified loading or performance: obtain the required material, temperature and assembly documentation. Do not infer a wattage limit, IP rating or certification from the profile photograph.

LSH-601C plaster-in LED profile section drawing with catalog dimension labels

Where these profiles can be considered

Straight plaster-in channels can form corridor lines, office ceiling accents and recessed wall details. One-sided sections can support perimeter or reveal concepts where only one plasterboard edge is available. Angled sections may help direct an accent toward an adjacent surface, subject to a light test.

For hospitality and retail projects, consider the unlit appearance, reflections on nearby finishes and viewing positions. For residential work, coordinate the light line with ceiling joints and access panels. These are application proposals based on the catalog structures, not claims that a particular model has already been installed in those projects.

LSH-2418 single-wing plaster-in LED aluminum channel with perforated fixing flange

Quality checks for samples and bulk supply

Approve a complete sample containing the housing, cover, selected strip, end treatment and fixing detail. Compare the extrusion with the drawing, inspect cut ends and check that the cover fits along the intended length. Record straightness, finish appearance and packaging acceptance criteria.

Where a material grade or wall thickness is required, list it explicitly on the purchase specification. Request supporting documentation for that order. Do not assume every profile in the range has the same alloy, thickness or thermal capacity.

For bulk orders, keep the approved sample and drawing revision with the item number. Check the first production pieces and verify that long lengths are protected in transit. Confirm the number of covers, end caps and joiners separately from the number of aluminum lengths.

LSH-1013DU double-wing plaster-in LED aluminum channel with perforated fixing flange

Costs, quotations and payment

Compare quotations on the same scope: aluminum length, cover type, finish, cutting or machining, accessories, packaging and freight. Differences in cross-section weight and finishing requirements can change the price even when two products have a similar visible width.

Send quantities by item and length, the destination, the required packing method and the expected delivery date. Ask whether strips and drivers are included. If the design requires a new die or a structural change, request a separate tooling assessment and sample approval stage.

Agree currency, quotation validity, delivery term and payment milestones in writing. Do not assume a standard deposit percentage or a fixed lead time. Confirm what must be approved before production starts and what inspection records will accompany the order.

[TO CONFIRM: Add your actual MOQ, quotation validity, sample policy, payment methods and milestones, delivery terms, warranty and enquiry link.]

LSH-2013DU double-wing plaster-in LED aluminum channel with perforated fixing flange

Project feedback and installation records

For a useful project record, show the selected item, the approved ceiling or wall detail, the unfinished fixing stage and the finished lit result. Record the strip and cover used, the site condition and any installation adjustment. This helps the next buyer compare a real construction detail with their own project.

[TO CONFIRM: Insert a real customer-approved project photo, country or project type, model, verified result and approved feedback. No testimonial or sales-volume claim has been supplied.]

LSH-1513SU single-wing plaster-in LED aluminum channel with perforated fixing flange

How to request a suitable profile

Send a CAD section, sketch or reference photograph together with the board thickness, visible line width, available depth, required lengths and quantity. Add the LED strip width, power requirement, diffuser preference and housing finish. If you are unsure which section fits, identify the part of the building detail that cannot change.

Use the item number and approved drawing revision in the final order. Review a sample before committing to long runs or difficult plasterboard details. LSH-4320 refers to the section selected from catalog 1.

LSH-4320 vertical-wing plaster-in LED aluminum channel with perforated fixing flange

Frequently asked questions

Is a plaster-in profile the same as a standard recessed channel?

A standard recessed channel can retain a visible trim. A plaster-in design integrates its fixing area into the finished board surface. Check the section and finishing detail rather than relying on the word recessed alone.

Which model is most popular?

No sales ranking is provided. Use the shortlist above to compare likely candidates for your construction detail.

Can I use the catalog width as my cutout?

No. The catalog can show total flange width, face dimension and internal span. Approve a separate cutout dimension.

Are these complete lights?

The catalog illustrates housings and covers. Confirm the supply scope for LED strips, drivers, end caps and other accessories in the quotation.

Are all dimensions confirmed?

The listed dimensions are readings from the uploaded catalog images. Final dimensions, tolerances require confirmation.

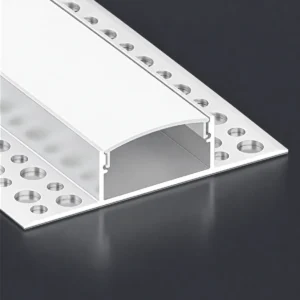
LSH-4018 angled plaster-in LED aluminum channel with perforated fixing flange
Scroll to Top

Request A Quote

inquiry led aluminum profile